Published
- 4 min read
How to Install Windows on a MacBook for Free (UTM + Windows Preview)
🎮 How to Install Windows on a MacBook for Free: UTM + Windows Preview
One day, I suddenly wanted to play LaTale, a nostalgic game from my childhood. But then came the problem: LaTale doesn’t officially support macOS… 😅
In this post, I’ll explain how I installed and ran Windows on my MacBook — for free — and share how it performs when running games.
🖥 Ways to Run Windows on a MacBook
There are several ways to run Windows on a Mac:
- Erase macOS completely and install Windows directly
- Install Windows via a virtual machine on top of macOS
However, erasing macOS basically defeats the purpose of owning a Mac, and the process is complicated and risky.
Realistically, the best choice is: Use a virtual machine to install Windows on macOS.
💸 Is It Possible to Do This for Free?
The most famous method is using Parallels, but it requires a paid subscription and isn’t cheap.
If you clicked on this blog post, chances are you’re like me: You want to install Windows without spending money.
So in this guide, I’ll show you how to: 👉 Use the free virtual machine UTM, and 👉 Download the Windows Insider Preview version to install and run Windows on your MacBook for free.
🔧 Summary of the Method Used
| Item | Details |
|---|---|
| Virtual Machine | UTM (Free) |
| Windows Version | Windows Insider Preview (ARM version, free download) |
🛠️ Quick Installation Guide
-
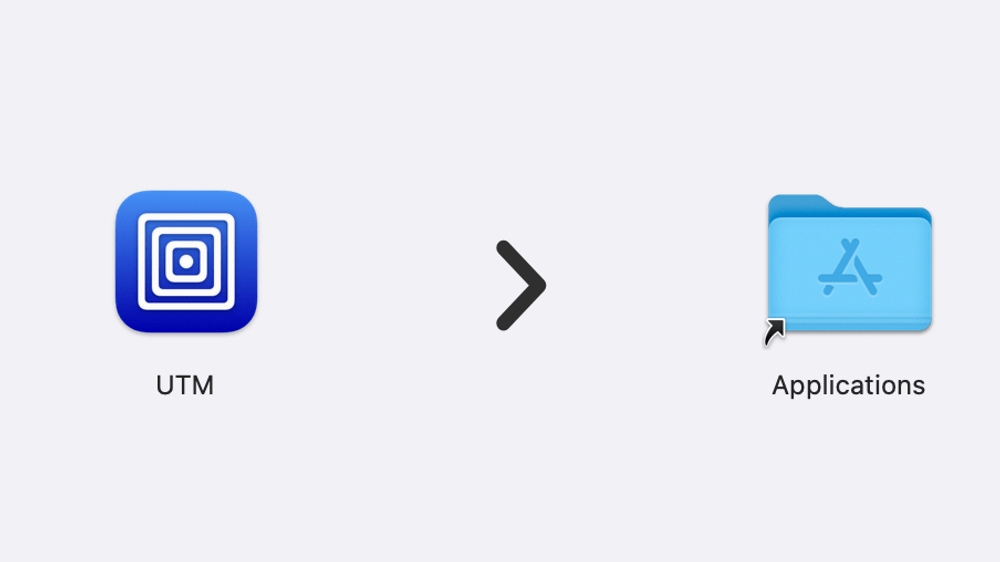
Install UTM Download the free UTM app from the official UTM site.
-
Download Windows Preview ISO
- Prepare a Microsoft account.
- Join the Windows Insider Program. (Joining is free.) Note: It may take about a day for your registration to fully process before you can download the ISO.
- Visit the Windows Insider Preview ISO Download page.
- Select your preferred edition. I recommend either the Canary or Release Preview Channel.
-
Set Up Windows on UTM
- Launch UTM → Create a New Virtual Machine → Choose Virtualize → Select Windows.
- Check all options: “Install Windows 10 or higher,” “Import VHDX Image,” and “Install drivers and SPICE tools.”
- Set the Boot VHDX Image to the ISO file you downloaded from Microsoft.
- Allocate memory: 4096MB (4GB) by default is fine, but if your Mac has 16GB RAM or more, allocating 8192MB (8GB) is better for performance.
- Skip the Shared Folder setup.
- Review the summary and click Save.
- Once setup is complete, double-click to start Windows. (Note: The first boot might take a while.)
-
Configure Windows Settings
Since it’s a virtual machine, you’ll face some setup issues like no network initially, and non-English users might encounter text encoding problems. Here’s what you need to do:
Network & Display Scaling Setup: Install Guest Tools

-
Choose your preferred region and language.
-
Skip the second keyboard layout option.
-
On the network connection screen, no “Skip” button will appear. Press fn + Shift + F10 (or just Shift + F10) to open the command prompt.
-
Enter
oobe\bypassnroand hit Enter. (This will force a reboot. If it fails, simply close and reopen the VM.) -
After rebooting, go through the region and language setup again.
-
This time, you’ll see an “I don’t have internet” button — click it.
-
Accept the agreements and proceed through setup.
-
Now you’ll see Windows running inside your Mac!
-
Go to the UTM Guest Support page and download the
spice-guest-tools.xxx.exepackage. -
Mount the ISO in UTM and install it. (This will enable network and screen scaling features properly.)
(Optional) Multi-language Settings
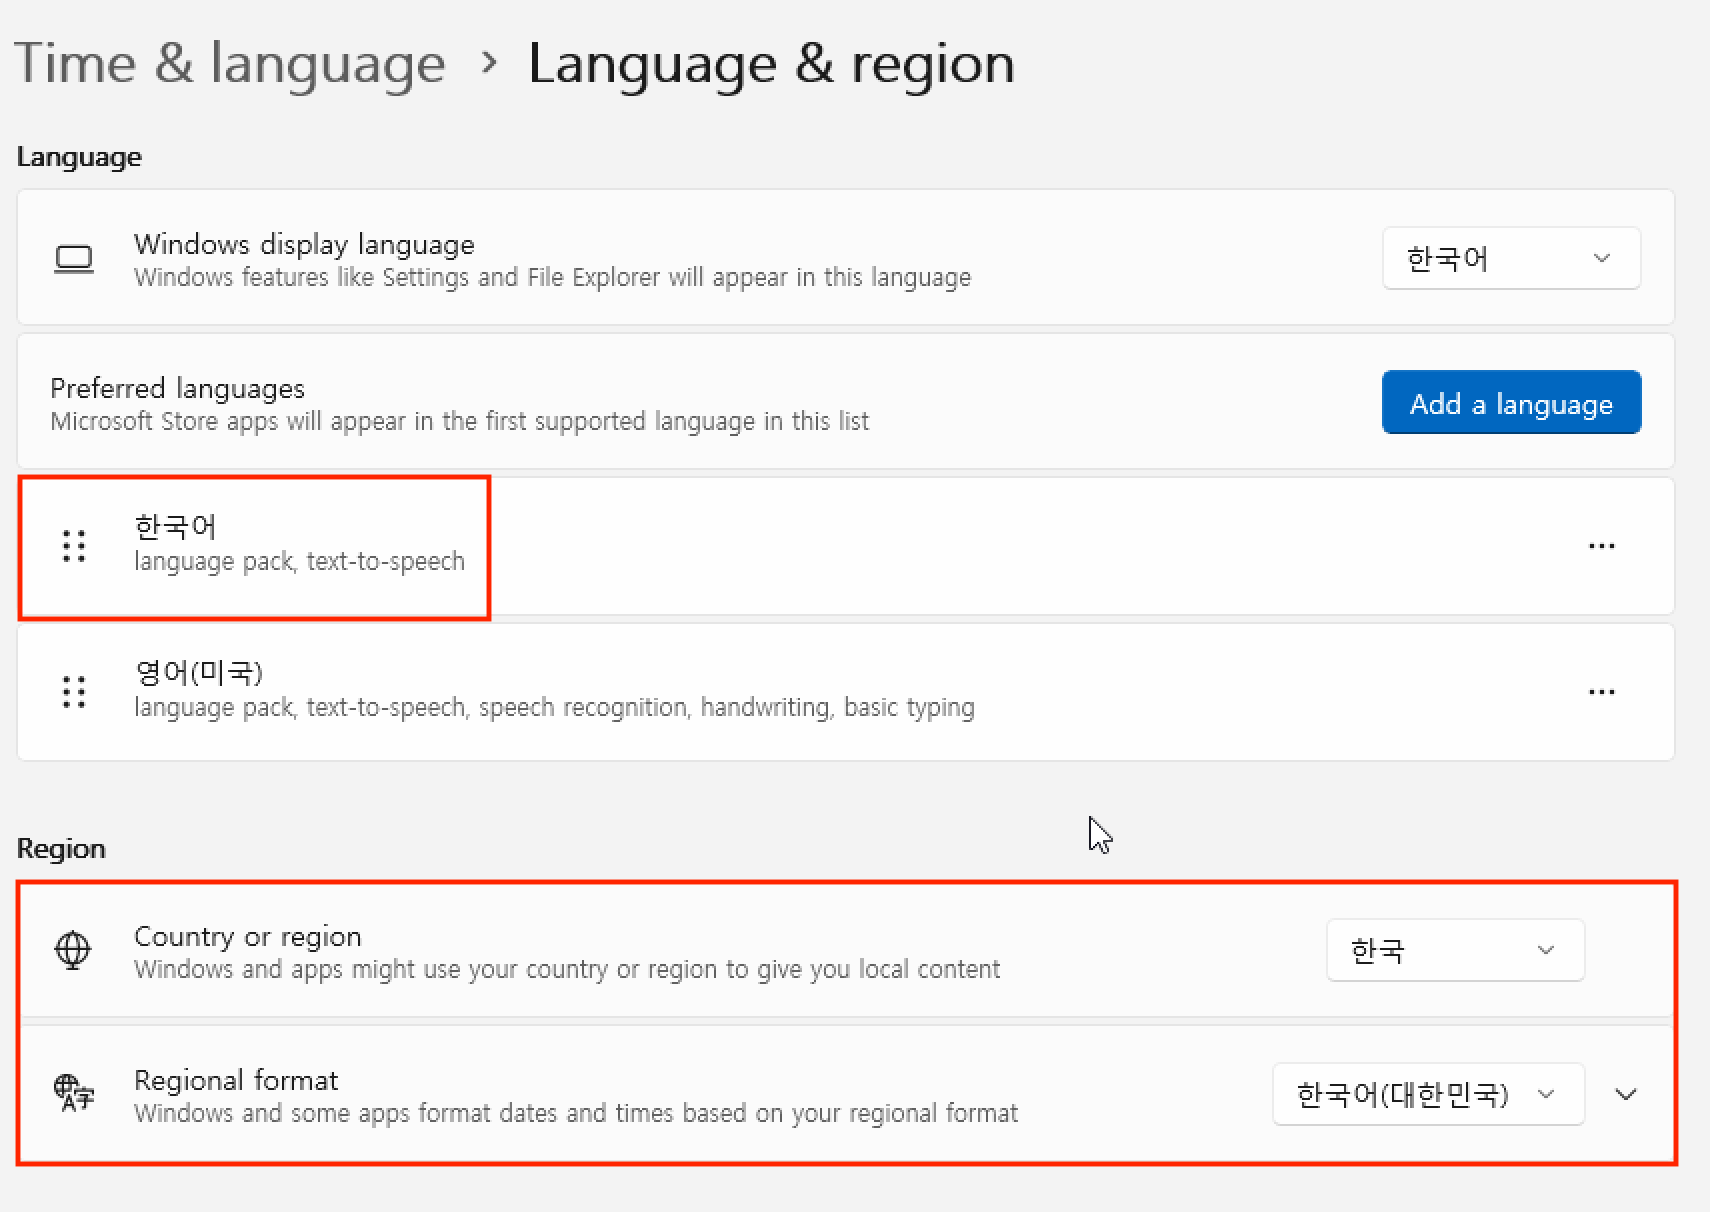

If you’re fine with English, you can skip this. Otherwise, for non-English users:
- Open Settings → Time & Language.
- Under Date & time, set your time zone.
- Under Language & region, add your preferred language and move it to the top.
- Then go to Administrative language settings → Change system locale and select your desired language. (Do not check the extra box below.)
-
-
Use Windows Freely After completing all setup steps, you can now freely install and run your desired programs!
⚡ Real-World Performance Review
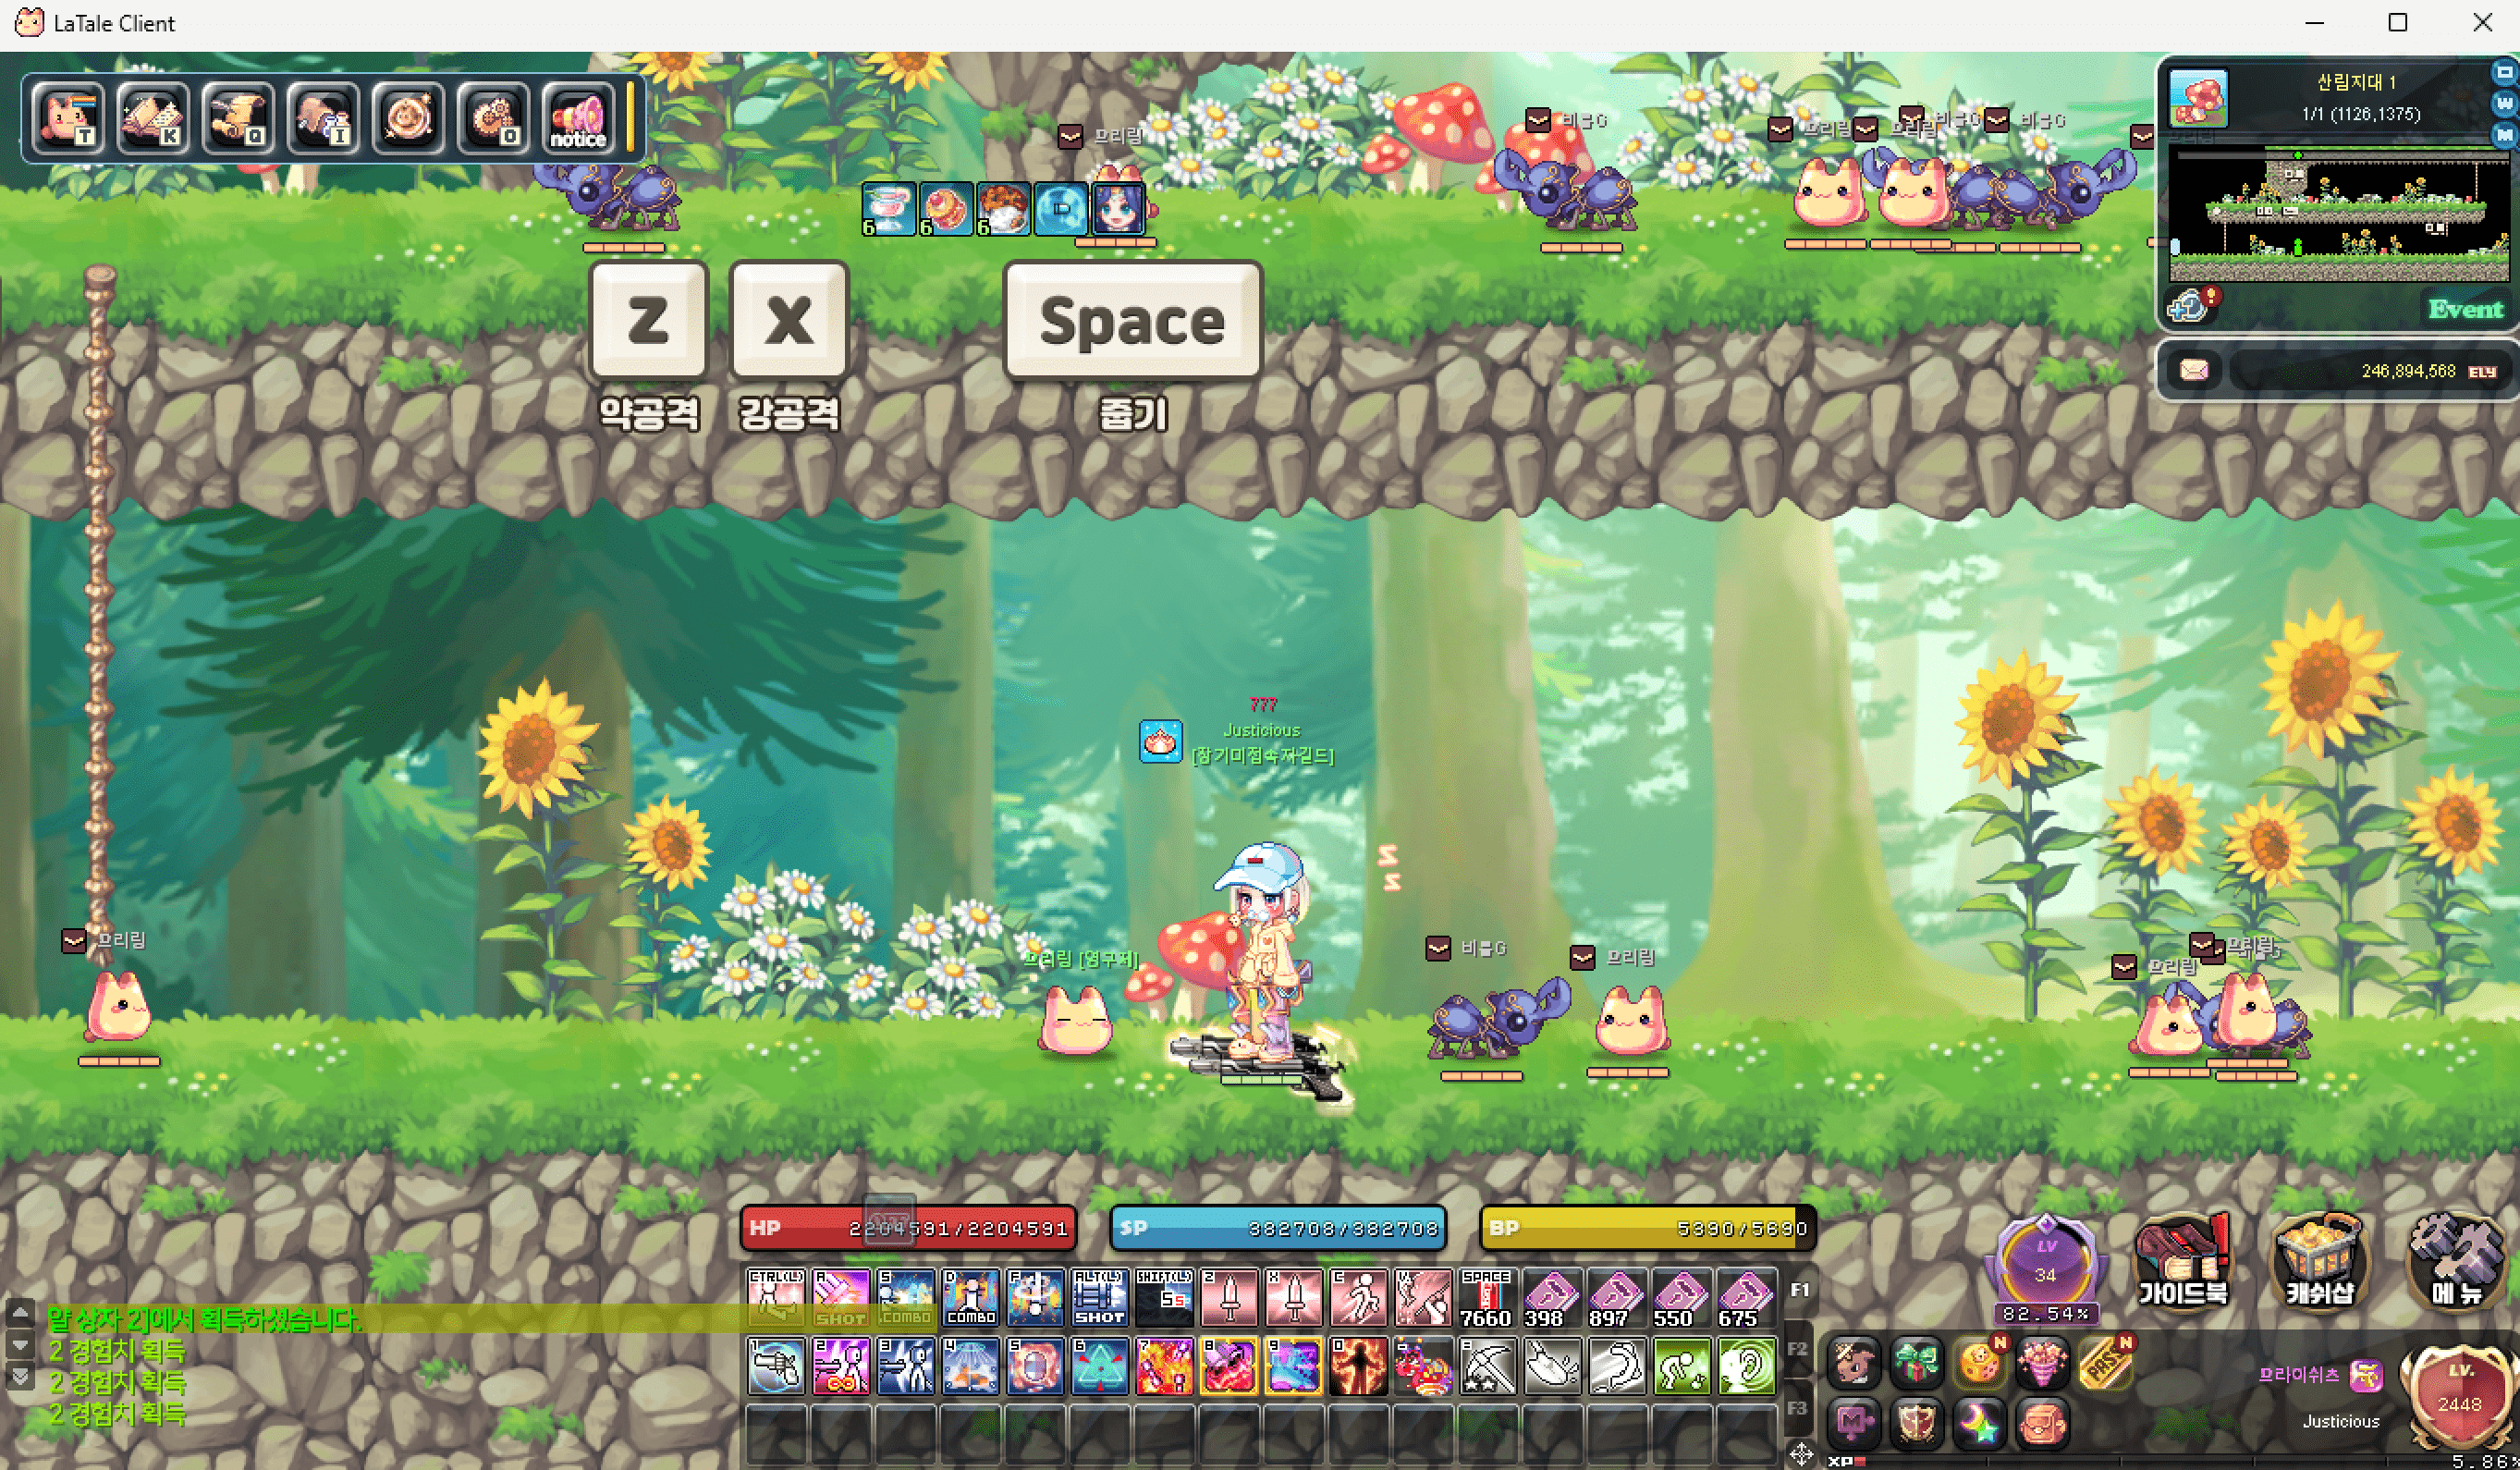
- Response Speed: Good enough for document work, but might struggle with real-time heavy programs.
- Graphics: Smooth on medium to low settings.
- Heat Management: Significant heat during long sessions on Intel Macs. (Use a cooling pad if necessary. On Apple Silicon Macs, it’s less of an issue.)
💡 Important Notes
-
Windows License:
- The Insider Preview is not a fully licensed version.
- It collects more telemetry data than a regular licensed Windows.
- If you’re concerned about privacy, I recommend getting a genuine Windows license.
-
Game Optimization:
- Don’t expect perfect performance — but considering it’s free, it’s definitely satisfying.
✨ Final Verdict
If you want to run Windows on a MacBook without spending a penny, UTM is a great option!
If you need Windows occasionally on your Mac, I highly recommend trying this setup 🙌